Wednesday, September 24, 2008

How to Crochet an Amigurumi Mushroom

075
099
PATTERN
With tan chain 2.
  1. Into the second ch from the hook sc 6.
  2. Sc inc around (12).
  3. *Sc, sc inc* around (18).
  4. *Sc 2, sc inc* around (24).
  5. Sc around (24).
  6. Sc around (24).
  7. Sc around (24).
  8. With brown, sc dec around in back loops only (12).
  9. Sc dec around (6). Stuff firmly, finish off and sew shut.
With tan chain 2.
  1. Into the second ch from the hook sc 6.
  2. Sc inc around (12).
  3. Sc around (12).
  4. Sc around (12).
  5. *Sc 2, sc dec* around (9).
  6. Sc around (9).
  7. Sc around (9). Stuff.
Sew the pieces together using tan thread.
You can use any other colours you like, too.

Thursday, September 18, 2008

Top Hat

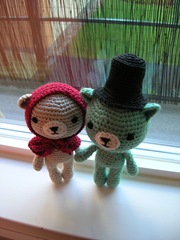
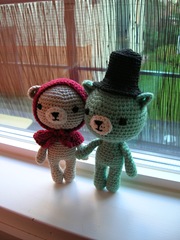
Amigurumi accessories: a crocheted top hat!

079

Made following this pattern. Very cute and quick.

073

Cruelly secured on to his head with sewing pins, ouch. But he looks cool. Or like a tramp.

Wednesday, September 17, 2008

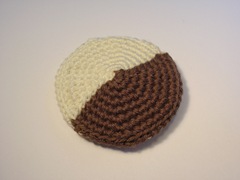
How to Crochet an Amigurumi Black and White Cookie

Yes, another crocheted cookie.
I'm not going to post a picture of the cookie I made, because the cookie has disappeared. It was on my desk and then it was gone. Where, I don't know. My guess is spontaneous digestion. It did look delicious.
If I ever find it, I'll post a picture. And maybe tell a tale of it's great adventures into the unknown...
PATTERN
With tan or a "cookie dough colour" of your choice chain 2.
  1. Into the second ch from the hook sc 6.
  2. Sc inc around (12).
  3. *Sc, sc inc* around (18).
  4. *Sc 2, sc inc* around (24).
  5. *Sc 3, sc inc* around (30).
  6. *Sc 4, sc inc* around (36).
  7. *Sc 5, sc inc* around (42).
  8. *Sc 6, sc inc* around (48). Finish off.
Make the topping in exact same way, except on the first round sc the first 3 with white and the next with brown (or if you prefer a darker chocolate, you may use black). On the next rounds you'll always crochet into the previous round's white sc with white and into the brown ones with brown. Here it is spelled out:
Chain 2 with white.
  1. Into the second ch from the hook sc 3 with white and 3 with brown (6).
  2. Sc inc around, first 3 inc with white, the next 3 with brown (12).
  3. *Sc, sc inc* around 3 times with white, 3 times with brown (18).
  4. *Sc 2, sc inc* around  3 times with white, 3 times with brown (24).
  5. *Sc 3, sc inc* around  3 times with white, 3 times with brown (30).
  6. *Sc 4, sc inc* around 3 times with white, 3 times with brown  (36).
  7. *Sc 5, sc inc* around 3 times with white, 3 times with brown  (42).
  8. *Sc 6, sc inc* around 3 times with white, 3 times with brown  (48). Finish off.
Now you have two options to sew the two pieces together:
  1. Sew the edges together with tan, all around.
  2. Sew the white half with white and the brown half with brown (this is what I did).
There you have it. I hope your cookie won't vanish.
EDIT: Here it is!
017

Tuesday, September 16, 2008

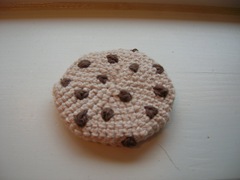
How to Crochet an Amigurumi Chocolate Chip Cookie

012
What a horrible picture once again!
Here is a pattern for a crocheted chocolate chip cookie. I seem to write my patterns using a bit different terms and directions every time. This is because I'm still trying to figure out the best way to write a pattern. I hope this is not too confusing!
PATTERN
Chain 2.
  1. Into the second ch from the hook sc 6.
  2. Sc inc around (12).
  3. *Sc, sc inc* around (18).
  4. *Sc 2, sc inc* around (24).
  5. *Sc 3, sc inc* around (30).
  6. *Sc 4, sc inc* around (36).
  7. *Sc 5, sc inc* around (42).
  8. *Sc 6, sc inc* around (48). Finish off.
Make two.
Embroider on the chocolate chips, note that what's normally the "wrong" or the back side will be facing outside! I liked this part the most. Usually when you embroider something you have to be really precise, but in this case the more deformed and weird the chips look the better!
Sew together along the edges the back sides facing out.
Do not eat!

Friday, September 12, 2008

Amigurumi Acorn

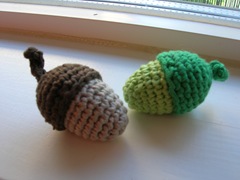
Here is a great free pattern from PlanetJune. Acorns!

011

She says hers are about 2 inches tall, but mine came out about 1 inch tall. I use a small hooks (1.50 - 2.00) so all the patterns I find in the Internet tend to come out tiny when I try them. But that's OK, I like all things tiny and cute.

On converse, all the patterns I write, probably turn out huge if you use a bigger hook. Sorry about that! I hope there are other small hook users out there, who find my patterns useful...

Wednesday, September 10, 2008

Apupupu

This is a campaign by the Finnish Red Cross. Actually was, but I'm a little late as usual.

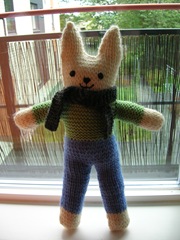
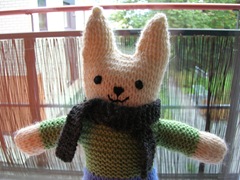
Apupupu, which must look like a crazy word for foreigners, means "help bunny". They are meant for traumatized children.

Here's a link to the pattern. It's in Finnish, but apparently the Australian Trauma Teddy is similar. So, if you'd like to help, you can make that one.

027

The Finnish campaign ended last Christmas (did I mention I was late?), so I hope they still accept these.

023

Aww, let's hug!

Monday, September 8, 2008

How to Crochet an Amigurumi Sun

I crocheted a tiny sun with an orange blush.
011
But now that I look at these pictures, she looks like Pikachu.
It's a sun, I swear! Look:
021
Anyway, the principle is sound, I'm sure! And if you use a nice yellow colour instead of a ghastly mustard, it'll be really cute, I promise!
PATTERN
Chain 2.
  1. Into the second ch from the hook sc 6.
  2. Sc inc around (12).
  3. *Sc, sc inc* around (18).
  4. *2 sc, sc inc* around (24).
  5. *3 sc, sc inc* around (30).
  6. Sc around (30).
  7. Sc around (30).
  8. Sc around (30).
  9. Sc around (30).
  10. Sc around (30).
  11. *3 sc, sc dec* around (24).
  12. *2 sc, sc dec* around (18).
  13. *1 sc, sc dec* around (12).
  14. Stuff, sc dec till you have a small hole, sew shut.
Rays: Chain 43, join with a slip stitch in to a ring. *Sc in the next chain, hdc in then next , [dc, tr, dc] all in one chain, hdc in the next, sc in the next, sl st in the next* 7 times, bind off, leaving a long tail.
Sew the ray piece on to the sun. Embroider on the face and glue on the cheeks.
P.S. If you try this pattern, please leave a comment! I would also love to see a picture of the finished product:)

Friday, September 5, 2008

How to Crochet Amigurumi Eyeballs

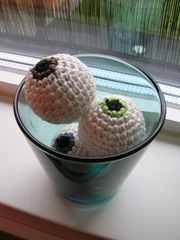
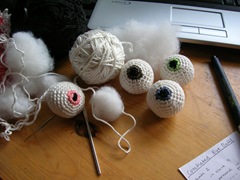
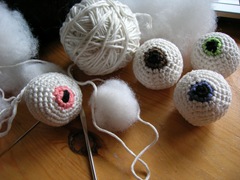
Yes, really. I crocheted some eyeballs.
I don't own a small jar, so to display them I opted for a glass. The problem with this is that they don't look remotely scary. More like a ...cocktail.
091
Mine are about the size of a real eyeball, I think. And no, I have no idea what to do with them.
PATTERN
Chain 2 with black.
  1. Into the second ch from the hook  5 sc.
  2. With the colour of your choice, sc inc around (10).
  3. With white, *sc, sc inc* around (15).
  4. *2 sc, sc inc* around (20).
  5. *3 sc, sc inc* around (25).
  6. *4 sc, sc inc* around (30).
  7. Sc around.
  8. Sc around.
  9. Sc around.
  10. *4 sc, sc dec* around (25).
  11. *3 sc, sc dec* around (20).
  12. *2 sc, sc dec* around (15).
  13. *1 sc, sc dec* around (10).
  14. Sc dec around, stuff, sew shut.
Bonus photos! This is what my desk looks like, when I'm working on a pattern.
125
120
P.S. If you try this pattern, please leave a comment! I would also love to see a picture of the finished product:)

Thursday, September 4, 2008

Donuts and Cookies

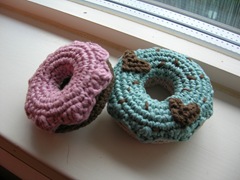
Some days it's just impossible to get good pictures. I'm going to blame the lighting again.
035
The pink donut was made with this pattern. It turned out cute and tiny, because in Finland thread is so much thinner compared to what the pattern called for. In America everything really is bigger, I guess. The blue one is bigger even though you cannot probably tell it by looking at the picture.
EDIT: The pattern seems to have disappeared, here's a similar one.
051
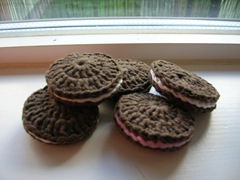
The Oreo pattern is from here. I've never eaten Oreo's as you cannot get them in Finland, but we have a very similar cookie (at least in looks) called Domino. So, I think these as Dominos. They look convincingly real; I had to stop my father from trying to eat one.

Tuesday, September 2, 2008

Coffee Jarrr

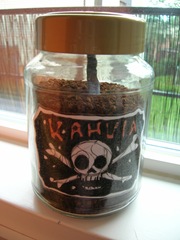
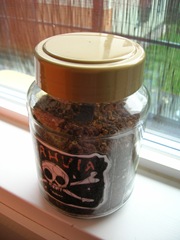
Haha! Ahem, anyway, I could not sleep last night and ended up sketching. This one started as just a skull, but ended up as a label for my coffee jar. I tried to mask the fact it's just a doodle by colouring it, but I'm not sure it worked...

021

Regardless, the jar looks way better with the new label. And instant coffee is my choice of poison.

015

Yar...

Monday, September 1, 2008

Related Posts Plugin for WordPress, Blogger...